The goals for today’s lesson are:
1. Identifying the parts of an HTML tag
2. Using the Bluefish Editor to add Headings and Paragraph tags to a website
Parts of a Simple HTML Element
The Bluefish Editor comes with a Tag tool that will automatically insert the correct tag syntax as you type in new lines on your web page documents. It is useful to first have a basic understanding of HTML tags. HTML tags come in pairs and tend to look like the following: <tagname>Content</tagname>
Note the slanted forward slash in the end tag or closing tag.
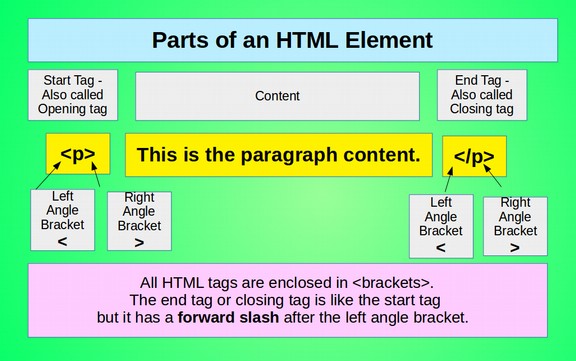
Note that there is a slight difference between the terms “HTML element” and “HTML tag.” An HTML element has a pair of tags and includes the content between the tags. Here is an example of an HTML element: <p>This is my first paragraph</p>
The Two Most Important HTML Elements
There are more than one hundred HTML elements. But most of the time, we will use the following two common elements: Headings and Paragraphs.
Heading Tags
Every HTML document should include a heading tag because Search Engines will look for the heading tag in order to label the web page. The intent of heading tags is to define divisions and subdivisions in the document, similar to chapters and sections of a book. Headings form the structure of your web page and the structure of your entire website. Here is an example of a pair of heading tags: <h1>This is my first heading!</h1>
Paragraph tags
Paragraphs are containers used to hold our sentences. A paragraph can have a single sentence. Or it can have a bunch of sentences. Each paragraph needs to begin with an opening <p> tag and end with a closing </p> tag. Here is an example of a pair of paragraph tags:
<p> This is an example of a paragraph that has more than one sentence. This paragraph has two sentences. </p>
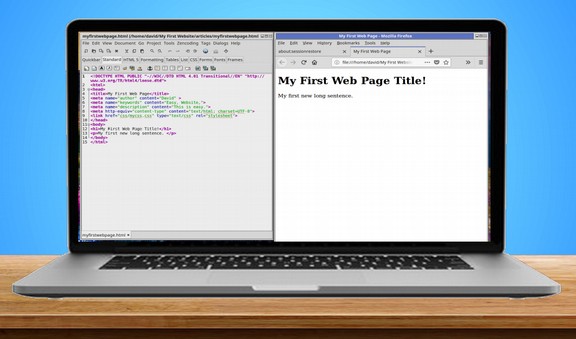
Side by Side Editing
Now that we have a better understanding of the Bluefish Editor, we are almost ready to create our first web page. But first, resize the Bluefish Editor so that it only takes up the left half of the screen. Then open your web browser in the right half of the screen. Our goal is to create the document with Bluefish and then view the result with our web browser. Here is what the end result should look like on our desktop:
Two Ways Bluefish Makes Coding Super Easy
In a moment, we will use the Bluefish Editor to make more paragraph and heading tags. But before we do, we should explain that Bluefish offers four different tools to create HTML code. These are a Code Template Tool, a Code Completion Tool, a Code Insertion Tool and a Code Wizard Tool.
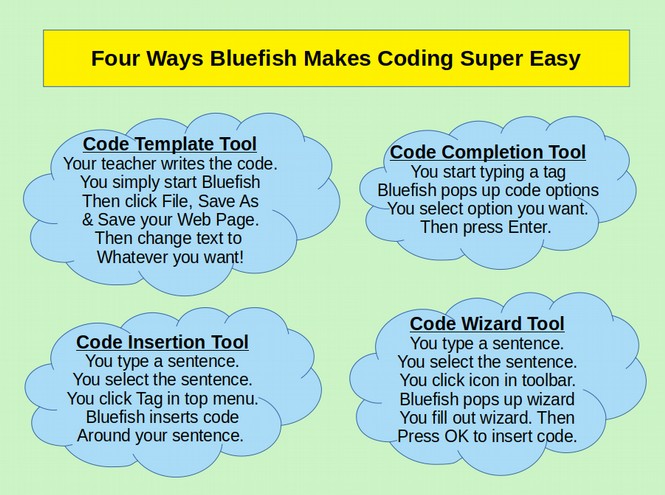
We are going to learn about the Code Template tool and the Code Completion tool.
Bluefish Code Template Tool
We have already used the Code Template Tool. In our last lesson, you simply opened the Bluefish Editor and there was already a web page waiting there for you. All you needed to do was save the file and give it a name. What you really did was open a template that I created and installed into your Bluefish Editor.
Here is a diagram summarizing how to use the Bluefish Code Template Tool:

Bluefish Code Completion Tool
We will use this tool later in this lesson to add new paragraph and heading tags. The benefit of this tool is that it helps you prevent making mistakes when adding code to your web pages.
Here is a diagram summarizing how to use the Bluefish Code Completion Tool:
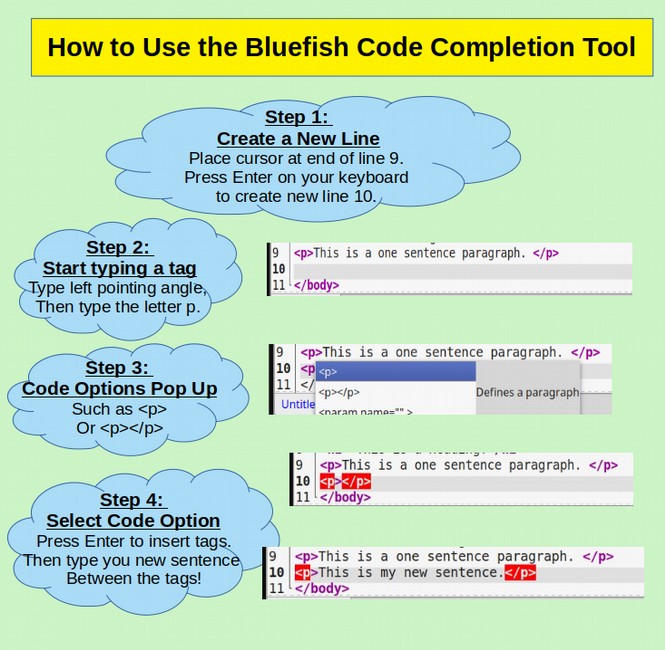
Note that it is generally quicker to select the paragraph tag pair and then insert your sentence in-between the tags than to merely select the opening tag, write your sentence and then type in another left pointing angle to get the Code Options to appear again.
We will explain how to use the Bluefish Code Wizard tool later in our lesson on how to add links to your web pages.
Open Your Website Root Folder
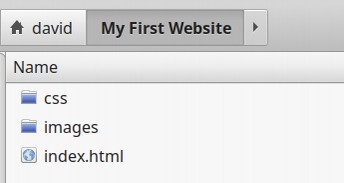
In our previous class, we created a folder called My First Website. Inside our Root folder, we created two more folders called css and images. We then created a folder called index.html. Open your file manager and your Website Root folder should look like the following.
Open Your First Bluefish Web Page
Right click on index.html to open this file with our Bluefish editor.
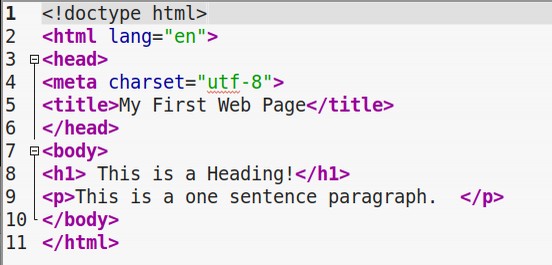
Now let’s use our Bluefish editor to add another Heading to our web page. To get Bluefish to create a pair of Heading tags, place your pointer after the closing </h1> tag. Then hit Enter on your keyboard to create a new line.
On our new Line 9, type in a left angle bracket followed by the lower case letter h. The following Code Completion screen will magically appear:

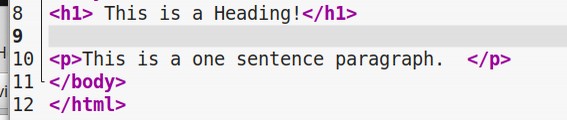
Click on the h2 tag pair to select this pair. Then press Enter on your keyboard to insert this tag pair into line 9.
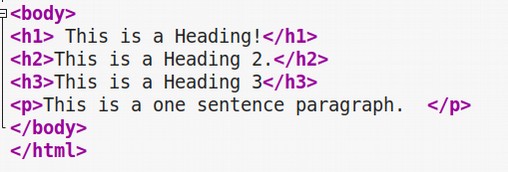
Place your cursor between the tag pair and type: This is a Heading 2.
Then for practice, place your cursor at the end of the heading 2 closing tag and press Enter on your keyboard to form a new line. Type the left bracket, then the letter h again. This time pick the h3 tag pair and press Enter on your keyboard to insert this tag pair into line 10. Place your cursor between the tag pair and type: This is a Heading 3.
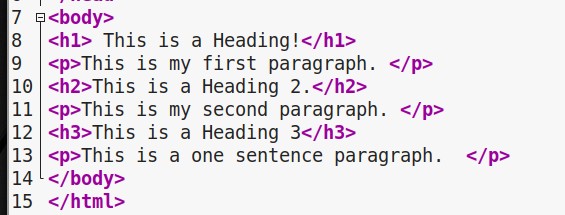
Here is what our workspace now looks like:
To see what our web page looks like, we could save this file and then open our file manager and right click on index.html and open it with our default web browser.
But Bluefish gives us a much faster way to view our web page after we have made a change. First, click File, Save to save our changes. Then look for and click on the blue globe in the Bluefish top menu:
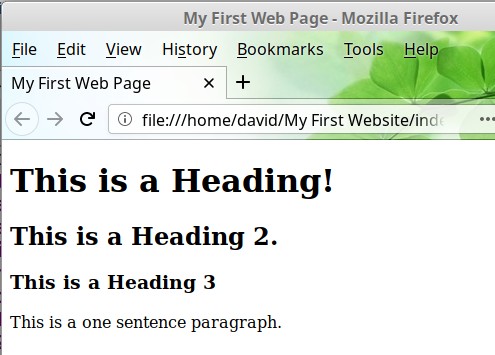
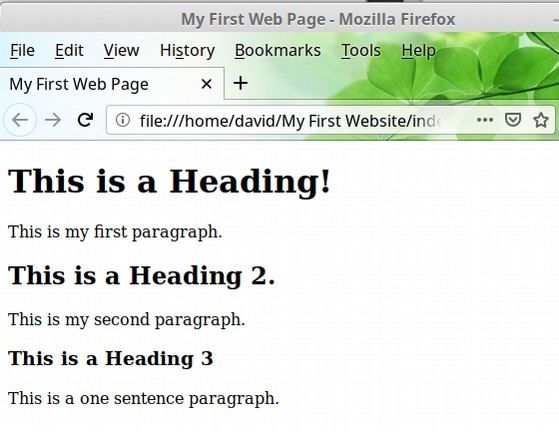
The web browser displays each heading differently with Heading 1 being the biggest and Heading 3 being much smaller – but still bigger than the sentence between our paragraph tags.
Note that you should only use the H1 tag only once on each web page – at the very beginning of the page to indicate the topic of the page so that search engines know what the page is about. We can break up the document into sections by using Sub Headings with H2 and or H3 tags.
Add Paragraphs after our Headings
When you are building a website, writing one or more sentences is known as writing a paragraph. Let’s add paragraphs after each of our three headings. Close the web browser and go back to our Bluefish editor. Place your cursor at the end of the heading 1 closing tag and press Enter on your keyboard to create a new line. Type a left bracket followed by the lower case letter p. The following screen will magically appear:
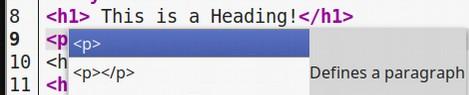
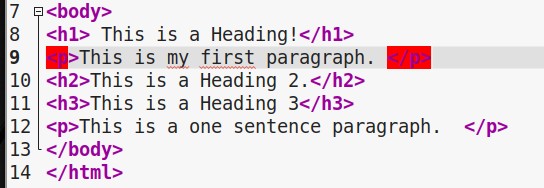
Select the paragraph tag pair. Then press Enter with your keyboard to insert this tag pair on line 9. Carefully place your cursor between the opening and closing tag pair. Then type: This is my first paragraph.
Here is what your workspace screen should now look like:
Next, place your cursor at the end of the h2 closing tag and press Enter to create a new line. We could use the Bluefish Code Completion Tool to add another pair of paragraph tags. But it is quicker to simply select and copy line 9 and then paste it into our new line 11. Do that now.
Then select the word first and replace it with the word second. Here is what our workspace now looks like now:
Then click File Save. Then click on the blue globe to see what our document now looks like in our web browser.
Tip: The best way to learn a new skill is to repeat it three times. So if you have time, go back to the beginning of this lesson and read it one more time – repeating each of the exercises to help gain more confidence with creating heading and paragraph tags!
What’s Next?
Hopefully, you know understand how to use the Bluefish editor to add heading and paragraph tags. Our Home web page now has some content. But our first web page still looks pretty boring. In the next section, we will use add some HTML attributes to make our website look better.