In Section 3, Website Essential Skills, we explain how to use the Bluefish Web Editor to more easily and rapidly create a basic web page. Our method is to learn by doing. We will learn HTML by creating a series of web pages.

Lesson 7 Create Your First Web Page

Lesson 8 Create Web Pages with Bluefish

Lesson 9 Heading and Paragraph Tags

Lesson 10 Style Attributes to Customize Text

Lesson 11 How to Add Images to Web Pages

Lesson 12 How to Add Color to Web Pages

Lesson 12 How to Add Color to Web Pages

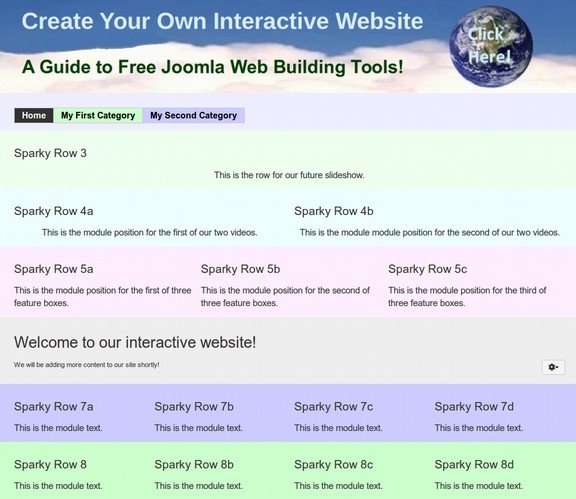
One of the least used areas of web design is the use of background colors to help the viewer understand the layout of the web pages. Imagine you have an online retail store with dozens of products in different categories on your Home page. Or imagine you have a news website with dozens of news articles in different categories on your Home page. In both cases and many more, using different background colors can help separate products or articles in one category from products or articles in the next category. In this lesson, we will discuss how to add more color to your web pages.

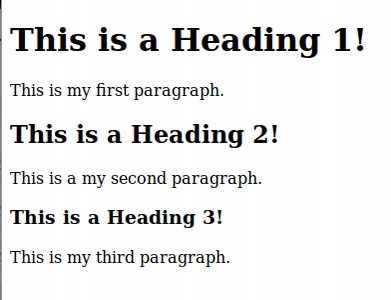
Here is an example of the use of background colors to divide and organize content on a web page.

01

Recall from a previous lesson, we learned how to use the style attribute to add color to heading and paragraph elements. To make the text of a paragraph blue, we inserted the attribute into the opening paragraph tag like this: <p style=”color: blue;”> This paragraph text is colored blue.</p>

We then provided several other color options such as green, red and orange. However, there is a more precise way to define thousands of color options using a 6 digit coding system called the Hexadecimal Color Code.

Here is a table of 20 background colors with their normal names and their Hexadecimal 6-digit codes:

Lesson 11 How to Add Images to Web Pages

Originally, there were no images on web pages. Just a lot of text. Then in 1992, Tim Bernes Lee placed the first image on the internet. It was a band made up of staff members. Here is a copy of that now famous image:

01

Images are in some ways even more important than links for your website. This is because many people (more than half of your viewers) are visual learners. They learn more from images than from reading text. Your viewers will learn more and be more likely to recommend your website to others if you make an effort to include several images on every web page. Most of the web pages on my educational websites have an average of ten or more images per web page.

Some courses mistakenly discourage the use of images. They argue that placing many images on your web page will slow down the loading speed. This is true if you fail to compress or reduce the file size of your images before adding them to your website. However, as long as you keep the file size of each image under 100KB, you should be able to have 10 or more images on a page and still have it load in under one second – assuming your viewers have a reasonable high speed internet connection.

Steps to Add an Image to Your Home Page
Before we add an image to our home page, we first need to optimize or reduce the file size of the image and then place the image in our images folder. Copy any image to a Writer document. Then right click on the image and click Compress. Then click OK. Then right click again on the image and click Save.

Lesson 10 Style Attributes to Customize Text

In our last lesson, we introduced simple HTML elements like headings and paragraph tags. In this lesson, you will learn how to customize the appearance of heading text and paragraph text using style attributes.

The goals of this lesson:

1. Learning parts of an HTML attribute

2. Learning the following 5 attribute Properties and Values: Font Color, Font Size, Font Weight, Font Family, Text Align.

An HTML attribute is a way to improve the appearance of the content on our web pages. In this lesson, we will describe HTML elements that have one or more attributes attached to them. HTML Attributes are used to modify HTML elements. We will use the Style Attribute to customize the appearance of the text in our headings and paragraphs.

What happens to the appearance of elements if you do not use attributes to modify them? Attributes are usually optional because browsers have their own preset automatic attributes they will apply to define the appearance of elements. But the style applied by the browser is can be improved. For example, at the end of the last lesson, we created three heading elements and three paragraph elements.

01

This looks pretty boring. You website will look much more interesting if you can change the color and size of your elements to make it look like this:

Lesson 9 Heading and Paragraph Tags

The goals for today’s lesson are:

1. Identifying the parts of an HTML tag

2. Using the Bluefish Editor to add Headings and Paragraph tags to a website

Parts of a Simple HTML Element
The Bluefish Editor comes with a Tag tool that will automatically insert the correct tag syntax as you type in new lines on your web page documents. It is useful to first have a basic understanding of HTML tags. HTML tags come in pairs and tend to look like the following: <tagname>Content</tagname>

Note the slanted forward slash in the end tag or closing tag.

01

Note that there is a slight difference between the terms “HTML element” and “HTML tag.” An HTML element has a pair of tags and includes the content between the tags. Here is an example of an HTML element: <p>This is my first paragraph</p>


The Two Most Important HTML Elements
There are more than one hundred HTML elements. But most of the time, we will use the following two common elements: Headings and Paragraphs.

Heading Tags
Every HTML document should include a heading tag because Search Engines will look for the heading tag in order to label the web page. The intent of heading tags is to define divisions and subdivisions in the document, similar to chapters and sections of a book. Headings form the structure of your web page and the structure of your entire website. Here is an example of a pair of heading tags: <h1>This is my first heading!</h1>

Paragraph tags
Paragraphs are containers used to hold our sentences. A paragraph can have a single sentence. Or it can have a bunch of sentences. Each paragraph needs to begin with an opening <p> tag and end with a closing </p> tag. Here is an example of a pair of paragraph tags:
<p> This is an example of a paragraph that has more than one sentence. This paragraph has two sentences. </p>

Lesson 8 Create a Web Page with Bluefish

In this lesson, we will create a web page using the Bluefish Editor.

Using Bluefish to make a web page
A long time ago, people used to use HTML and a simple text editor to create web pages- just like you just did. Writing HTML with a text editor takes a lot of time because each opening and closing tag has to be typed in manually. Because it takes a lot of time and we want to make learning HTML easier, we have a better way to do things. We will use an open source code editor called Bluefish.

Bluefish adds the HTML tags for us and allows us to quickly view our progress while at the same time helping us to learn HTML. With Bluefish we don’t have to actually type in the opening and closing brackets. <YAY!>
You do not need a license to download and run Bluefish. If you have a Windows or Apple computer, you can download Bluefish from the Bluefish download page. If you have a Linux Mint computer, just open the Software Manager and type Bluefish in the Search Box. Then click on Bluefish and click INSTALL. Either way when you open Bluefish, you will see this Editor.

The Bluefish Editor Screen

01

This screen looks complicated– even intimidating with all of its options. But most of these options are rarely used. Because we want to focus on the workspace, we will hide the Side Panel, Status Bar and Snippets menu. These can all be re-opened with a click of a button if and when we need them. This will create a much simpler interface.

Sections of the Simplified Bluefish Editor
To hide the Side PanelClick on the View Menu Item in the Top Main Menu, then un-check the Side Panel, Status Bar and Snippets Menu. This is the Bluefish Editor after hiding the Side Panel and Status Bar.

Lesson 7 Create Your First Web Page

The goals for today’s lesson are to:

1. Create an HTML root folder.

2. Understand a few HTML terms.

3. Create your first web page with a Text Editor.

Use your File Manager to Create Your Website Root Folder
The first step in building any website is to create a website root folder. A website root folder is the folder that holds all of the documents used to make your website. We are going to do that now. Open Your File Manager and create a folder called My First Website. There are two ways you can create a new folder with your file manager. The first way is to go to your file manager top menu and click File, Create New Folder:

01

This will place a folder in your file manager called Untitled Folder.